Lightweight Metal Casting From FDM Prints
The model completed, I needed to figure out an efficient way of casting this in metal. I scaled my design down to 1:4 of its final size for trials. It was printed in ABS on one of the Up! Printers in the Maker Garage to yield a positive model.
Initially I attempted to do a sand casting using a homemade greensand. I used a fine filter (about 120 micron) to remove all large particles from four samples of commercial sand; Quickcrete brand play sand, patio paver base sand, mason sand, and VitroClean glass filter media.
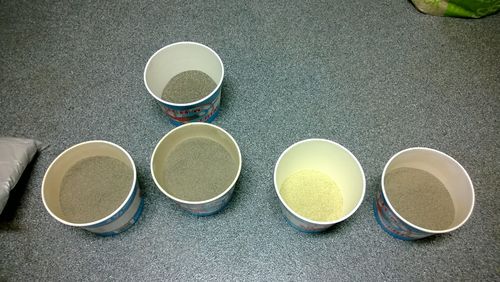
Next bentonite clay is added to about 100:12 (sand:clay) by weight.
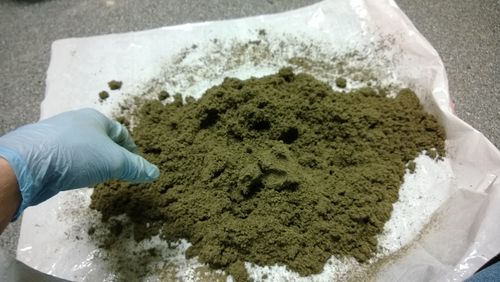
Although I attempted to mill large clay fragments to a fine mesh, this loaded up my ball mill media quickly and proved too difficult for my purposes. Instead I bought pre-milled bentonite clay from Ebay. Finally, water is added and the sand, clay, and water are mixed well. When properly completed, this yields greensand that will take and hold the shape of your fist when compressed, but still breaks cleanly and without debris if bent. It’s like play-dough for adults.
The greensand was then packed hard and the positive model was pressed into it, leading to a negative suitable to pour molten metal into.
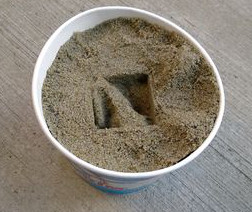
Alternatively the positive can be left on the bottom of the mold and the greensand packed in hard on top of it.
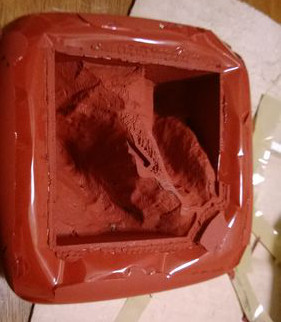
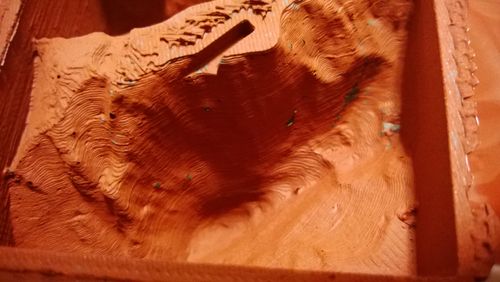
That completed, I tried several other materials to see what produces the cleanest end product. One was a high-temperature RTV silicone designed for sealing fireplaces. Spackle compound didn’t work at all, even with thin layers fully hardening and a graphite mold release it proved difficult to remove the plastic positive without destroying the mold. I also used plaster of Paris, let it harden completely, and removed the positive by dissolving the ABS in acetone for one model and via burning (with a MAPP torch) for a second. My final sample used Mold Max 60 tin-cure RTV silicone from Smooth-On. This is designed deliberately for casting of epoxy and low temperature metals, including pewter. You can see below how detailed the negative is with this product (the black specks are a graphite-based mold release compound), the individual layers of ABS from the 3d print are clearly visible:
I bought 15 lbs of R92 pewter from Rotometals. This lead-free pewter is made from 92% Tin and 8% Antimony. Reclaimed pewter, although substantially less expensive, contains lead and gives off dangerous heavy-metal fumes when melting.
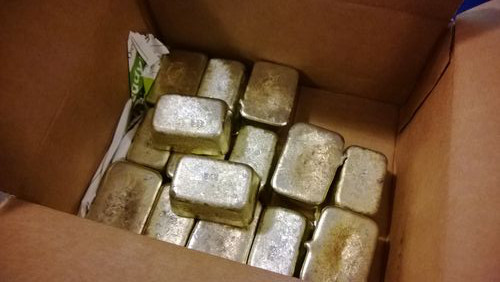
Different alloys have different properties, for instance others are be easier to work after casting. This alloy is quite hard, and using hand tools is quite difficult. R92 melts at 466 Fahrenheit and should be poured at 500f. This low of a temperature is easy to melt using a simple propane burner in an aluminium pot.
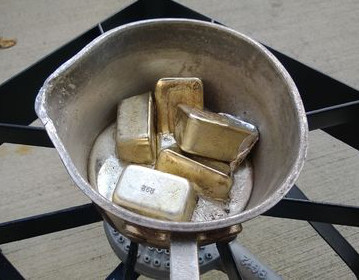
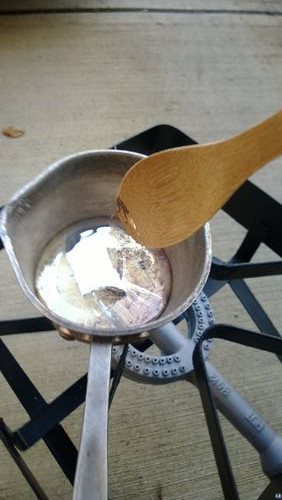
Try and avoid stirring the liquid, this will just introduce more oxygen and lead to more slag. Before pouring, remove the dross that accumulates on the surface of the melt with a spoon. You can see how shiny it becomes below.
Attempt to pour the metal in one smooth motion. It can help to build a “channel” which will be cut off of the final model and pour into that and let the metal flow into the final model. You can see the channel to the left of this picture.
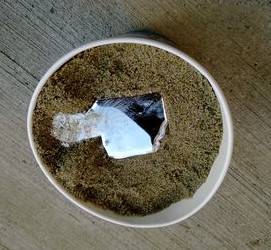
After cooling, all the samples were compared:
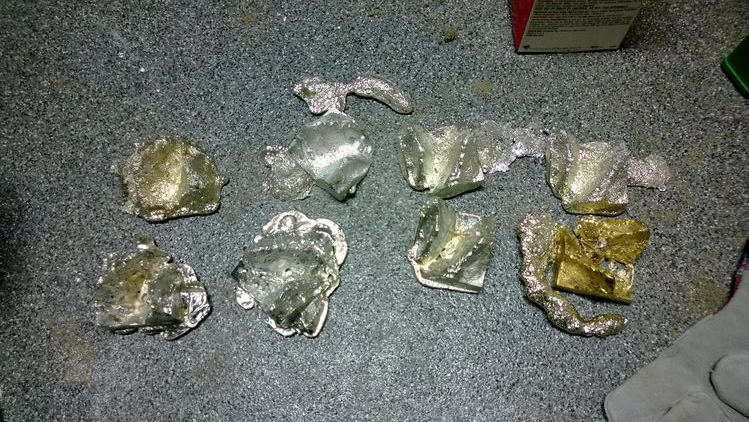
The samples are (clockwise from top left):
1. Greensand produced from VitroClean filter media (crushed glass)
Lowest quality casting in general, large grain size yields poor detail with an irregular surface.
2. Greensand produced from Quikrete play sand
Mostly comparable to patio paver base sand, middle results for sand casting.
3. Greensand produced from Quikrete mason sand
Best sand casting results, but still lost a lot of detail. Would be great for functional parts, but not comfortable for fine features.
4. Greensand produced from Quikrete patio paver base sand
Mostly comparable to play sand, middle results for sand casting.
5. High temperature RTV fireplace sealant silicone
The rich gold color of this casting is actually surface oxidation, likely due to the acid used in the RTV process for this silicone. While the results are fairly impressive, this required a bit of manual dressing after the original positive is removed where the silicone was unable to completely cure. The extreme oxidation gives me pause, it’s possible that small amounts of acid are captured in the metal, leading to oxidation down the line.
6. Smooth-On Mold Max 60 tin-cure silicone
Astounding detail, and the durability of the mold means it can be used several times to produce the same design. On the downside, the material is pretty expensive.
7. Plaster of Paris, positive burned out
8. Plaster of Paris, positive removed with acetone
The acetone results were better than the burn-out results in general. However, both castings have large voids in the end product. I’m not completely sure why, but during the pour a large amount of gas was obviously passing through the liquid, it almost looked like it was boiling. It’s possible that the moisture was not completely removed from the plaster and created steam when exposed to the metal. If I used this method again, I’d probably fire the negative mold for a few hours after it hardens to ensure all the water is driven off. It may also be thermal decomposition of the lime, and if so that doesn’t seem solvable.
Additionally, these molds need to be broken to remove the casting, so is one-time use (like the greensand), but also cannot be recycled (like the silicones), so is more difficult to use.
After all these castings, I decided that the Smooth-On product was the best choice, even with the additional cost.
To produce the final casting, I printed out the model at 120mm x 120mm, with minimum fill, thin walls and high detail. This took almost 20 hours of print time while using only a little less than 100g of ABS plastic.
***WARNING: I DO NOT RECOMMEND THE BELOW METHOD, IT’S FREEKING DANGEROUS***
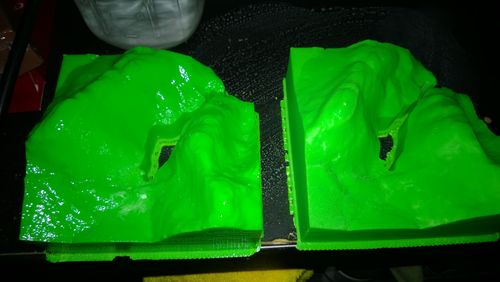
Although the lines of a 3d print add a bit of a cool texture to the model, I wanted to have a relatively smooth surface with only faint lines still visible. I tried my hand at acetone vapor smoothing at the recommendation of a few other Makers. This is done by boiling a small amount of acetone and then bathing the model in the vapors. Acetone dissolves ABS, and the vapors will eat small bits of plastic from high points on the model and deposit them in low points. This leads to an exceptionally smooth model that almost looks injection molded. One of the neat side effects of acetone being heavier than air is you can literally scoop up the vapors in a cup and pour them over parts of your model you want extra smoothing for, without damaging other parts with excessive exposure. In the following pictures, the 3d printed part is completely dry, though it still looks wet. The sheen is simply from the smoothing:
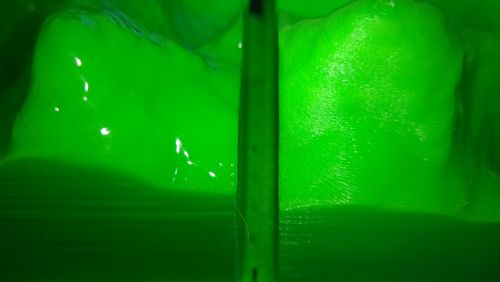
Unfortunately I found this method to be unacceptably dangerous. Acetone is highly flammable, and after deliberately exposing the vapor bath to a flame source to see how vigorous the flame would be, I ended up with a fireball above my head and right in my face. I’m not likely to use this method again without some way of restricting and containing the acetone vapors.
Next I made the negative from the Smooth-On silicone. This is a 2-part cure product, so you mix part B (the thick red liquid) with a small amount of part A (thin blue liquid) in precise amounts and mix well. A sub-gram scale is mandatory here:
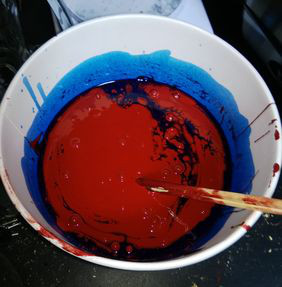
Ideally you pull a fairly strong vacuum on the resulting mixture to remove bubbles introduced during stirring. If there are too many voids, it’s possible that your model would have large “bubbles” in the resulting pour or even fail completely due to insufficient strength. I used a small homemade vacuum chamber with an electric vacuum pump for this. A word of warning, the fumes ended up destroying one of my vacuum relays. I’m guessing something in the compound attacks soft plastic.
Pour the mixture directly over the positive plastic model, it will self-level and fill any holes. If you are using a solid model like this one you’ll probably need to attach the model to the bottom of your container or else it will float above the silicone. A little glue or tape can do the trick.
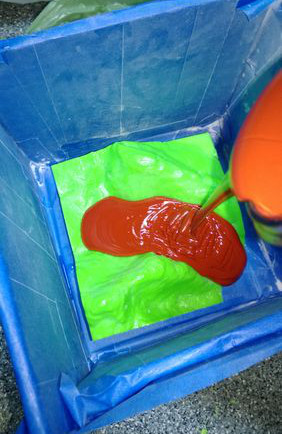
Give the silicone 24 hours to fully cure and then use a razor and a gentle touch to remove the plastic positive from the negative mold. I also used an old wire wheel to remove thicker sections of silicone.
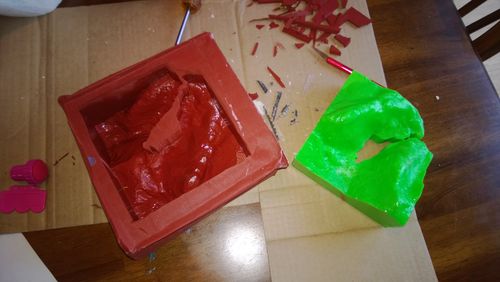
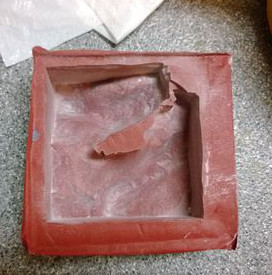
Next the negative was baked at about 150f for 3 hours with a desiccant to remove any residual water or alcohol from the reaction. Then the mold was lightly brushed with talc to serve as a release agent:
I melted approximately 10 lbs of pewter, including several of my previous test castings, and removed all of the dross.
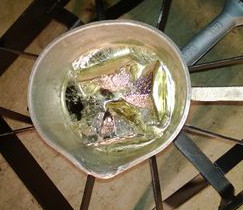
This casting required a bit more of a careful pour, both due to the smaller walls compared to the test mold as well as the heaver melt. In fact, I ended up having to pour in two separate passes due to overheating of my gloves, but the grain boundary is hard to see in the finished product.
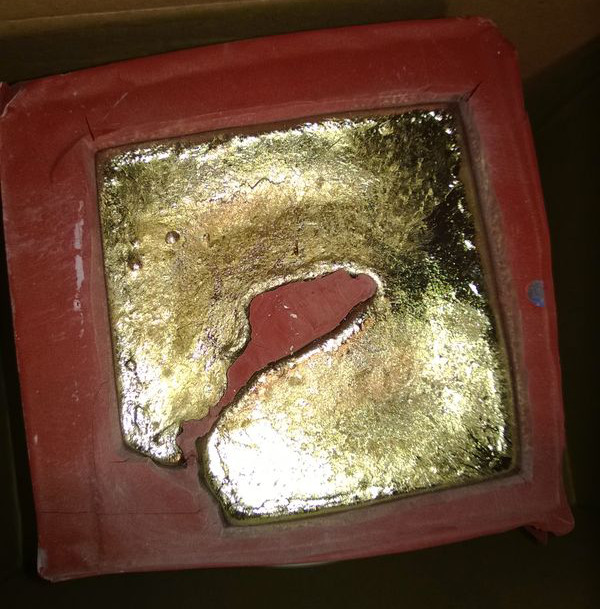
After cooling overnight, you can see a bit of shrink in the underside of the model. Fortunately this will be hidden by the base plate. The mold can be carefully removed and used again.
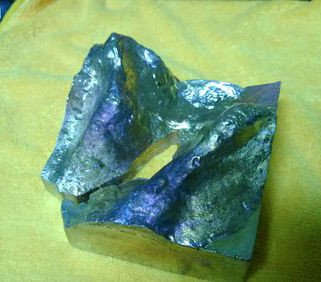
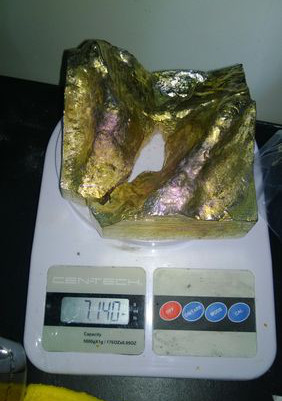
There’s a lot of oxidation on this piece that will be removed later. This casting ended up being 7.14 lbs, about 3/4s of a pound lighter than expected. This is most likely due to shrink and a base that was not completely filled.
To clean the model I used a stainless steel wire wheel. Stainless should be used on white metals due to rust danger on the finished part. You can see the difference in the half polished model below:
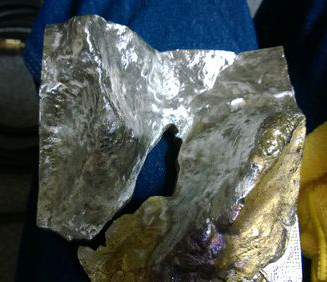
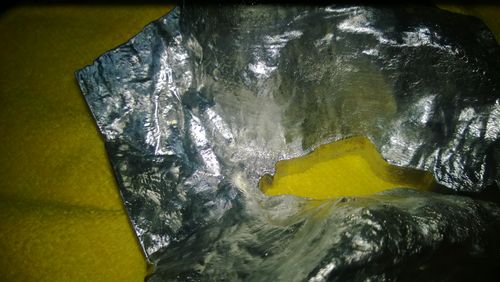
Finally, a liquid polish like Simichrome can be applied to make it really shine:
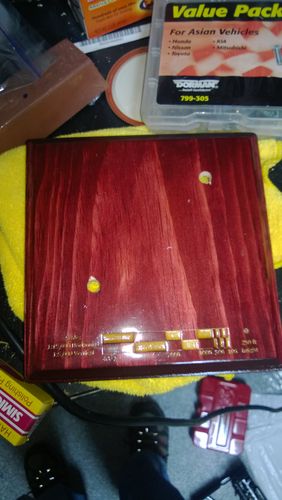
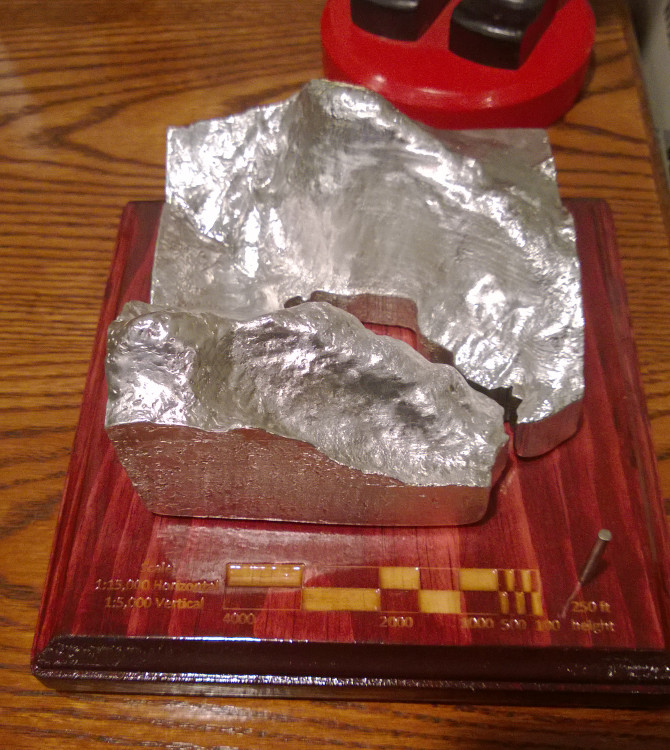
I got a simple bass wood base plate from Jo-Ann Fabrics and used a merlot colored stain. I laser engraved a scale and some wording to the plate. Laser engraving after the stain provides a lot of color differentiation; it looked almost like an inlay. After engraving I applied several coats of a water based high gloss polyurethane. I also drilled mounting holes and a spot for a vertical scale reference as the model has its height exaggerated about 3x for aesthetic reasons.
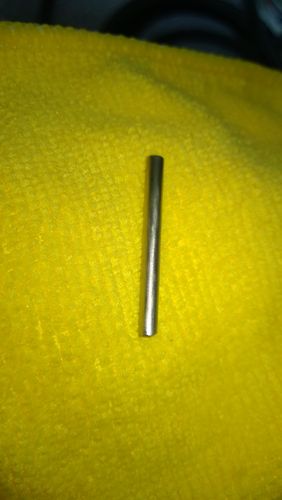
The vertical post was made of a small polished titanium rod.
The bottom of the pewter model was drilled and tapped to attach it to the base. Bolts hold it in, and small rubber feet were used to level the model and also on the base to prevent it from marring any surface it sits on.
Hope this provides you with some inspiration for your next project!
